Are you bored with your usual saree style? Draping a saree for many women is a well known art, but draping a plain saree into several styles is possible. Perhaps it’s time for you to reinvent your saree look with these stunningly beautiful styles.
Sarees have always been known for its elegance and gracefulness. A woman who dons a saree beautifully never fails to turn heads. Sarees are traditionally worn mostly during weddings, parties, festivities and religious ceremonies. Finding the right saree style for your next occasion would be a delight as you check out these amazing looks and inventions.
Pleated Saree Draping
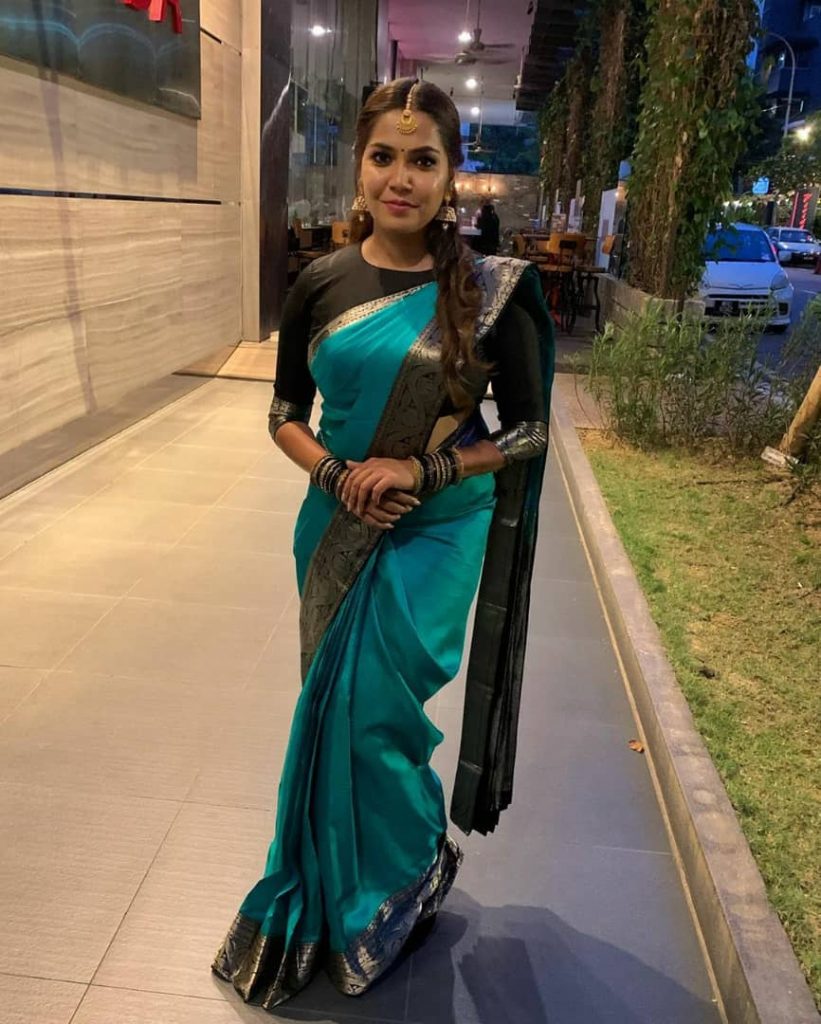
Steps to follow:
1. Take the saree end from the top bottom, tuck it in your petticoat, begin from the right side of your waist to your left leg.
2. Place the drape around the body from the back of the left hand to the middle forehead, tucking it in.
3. Then you’re going to have to make 6-8 of 5-6 inches of the leftover drape in the middle and tuck it in the petticoat, facing the pleats to the left.
4. Bring the open drape from the right side across your back to your front, without tucking it. You can pin the pleats to the centre so that they are in a centralised position and tuck the edge of the drape to the left waist.
5. Then keep the width, pallu part of the saree and render the pleats with an uneven width of 5-6 inches, making sure the border lies on the first pleat to drape it on the shoulder.
6. Hold the pleats vertically and bring the drape fall from beneath the right armhole, pulling it up towards and across your left shoulder.
7. Put the pleats properly on your left shoulder, keeping at least one meter of length to fall from the shoulder point, and pin it in place to fix it.
Gujarati Style Saree Draping
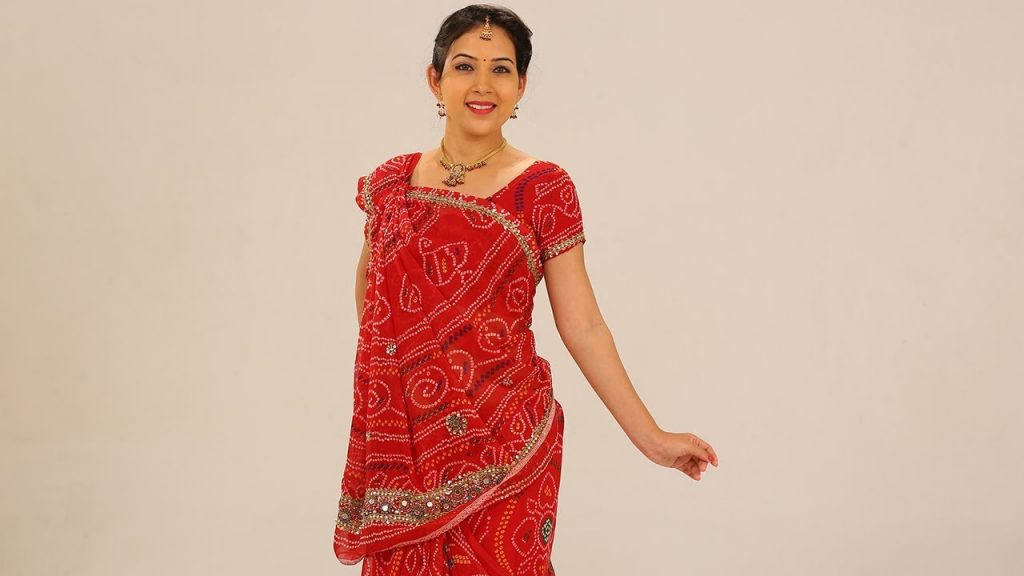 Steps to follow:
- Hold non-pallu end on the right side and tuck it inside the petticoat. Make one full round and take it to the left.
- Take 6-7 folds of the same breadth, keep them together in one place and tuck them in the middle of the waist inside the petticoat.
- Make pallu pleats like usual and place the pallu end over your right shoulder. Cover the bust by spreading these pleats.
- Put a safety pin to the pallu.
- Take the pallu’s left edge around your waist, and tuck it in your petticoat. It’s done.
Bengali Style Saree Draping
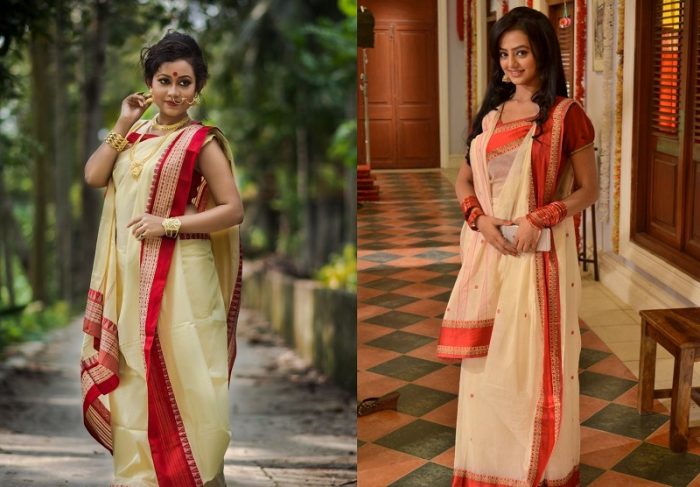
Steps to follow:
- The foundation for Bengali-style saree wearing is similar to Nivi style saree draping. Start by tucking over your navel a little over your saree, then to the right. Now, continue tucking from the left side of your waist by taking it around the waist. Do it till you come back to the starting point.
- Now, start making large pleats starting on the left side of your belly button and fold it in a way that finishes on the right hip.
- The length of pleats make a lot of difference to this style, so ensure that they level with the ground.
- The pleats should look simple and boxy.
- Unlike other Saree draping styles, you don’t need too many pleats. Only two of them are needed – all you to do is to flatten them, and tuck them away into the inner skirt.
- Now, bring the saree to your left front and begin to make thin pleats. The size of the pleats should be that of a border size.
- Now, free the pallu, and make sure the saree’s length reaches the ground.If you’re a beginner, clip the pleats to stay intact.
- The pleats should be thin and intact .
- Once you have adjusted it, remove the clips, if you used any, do bring the right side border of the pleated pallu towards the right shoulder. Bring it all the way under your armhole and tuck it near the right side of your hip.
- Now, take the tip of the pallu, nothing but the end of the saree and bring it to the front from under your right hand.
- Throw it over your right shoulder. You can add a tassel or fancy key ring for it to pop out.
- Adjust your box pleats, pallu and any other protruding parts of the safe, and secure them with safety pins. Bam! You’re done!
Pant Style Saree Draping
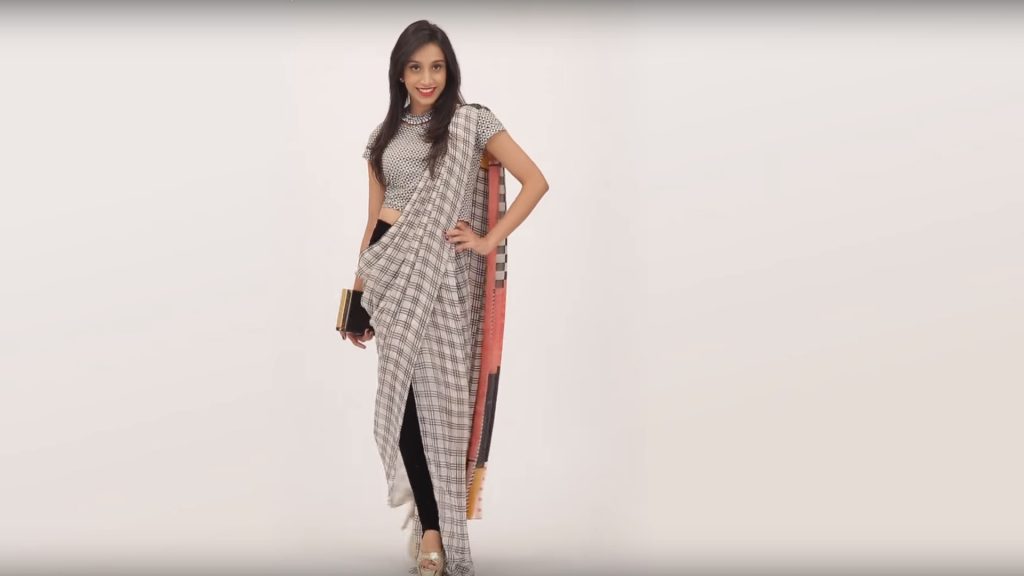
Steps to follow:
- First of all, take a saree that is shorter in length than normal sarees. It would be perfect if you had to choose a georgette or a chiffon saree to make it a pant type saree.
- Now you’ve got to keep the end of your saree (non-pallu end) and start making pleats. You should make things according to your needs, but 5 to 6 pleats would be all right. Make sure you cover this with a safety pin.
- Tuck them into the front middle of your pants. Keep them nice, so that the pleats are clearly visible.
- Now take the other end and drape the remaining saree around your waist. Toss the end on your left shoulder.
- After that, continue creating the pleats and attach them with the pins on the shoulder of your blouse. Now, go rock that contemporary saree look.
Dhoti Style Saree Draping

Steps to follow:
- The Dhoti style saree draping is pretty simple. You have to drape the satin or georgette saree around your lower waist. Take note to leave 1 to 2 meters at the end of your saree (non-pallu end).
- Start overlapping both ends and then attach them with a safety pin in the middle. Now you have to make the pleats and then wrap it around your back. After that, you have to bring the remaining portion to the front.
- Now, just bring the pallu over your shoulder, make sure the pleats are neat. Secure it with a safety pin on the blouse. After that, you’ll have to take the lower portion of the pallu, wrap it around your back and then put it to the front. Make sure you patch it with safety pins and show off clean pleats.
- After that, you have to take the remaining portion from the left and drape the pleats in the shape of a dhoti. Fix it with a safety pin and bring it back while manoeuvring between the legs and then tuck it.
- Now, take the falling part to the front and put it in the middle. Secure the front drape with pins to avoid the opening of the pleats. You have achieved the desired look!
Lehenga Style Saree Draping
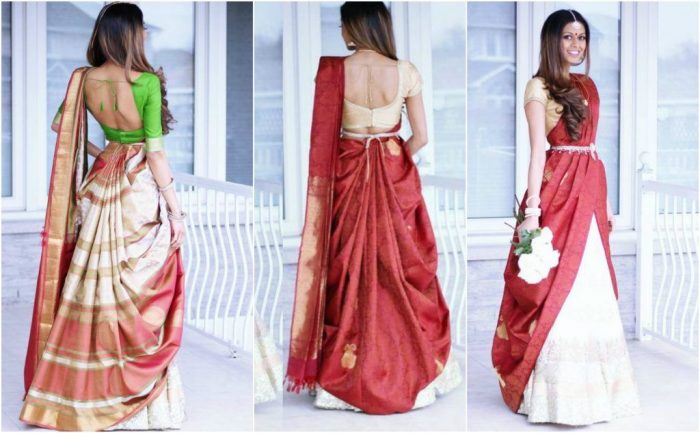
Steps to follow:
- Take the other end of the saree and tuck it at the back, right at the centre and bring it to the right-hand side. Continue tucking as you carry it to the right side of your stomach.
- Start to pleat very neatly. The first pleat may be shaped with a width of 4 to 5 inches. The second and the following pleats will have to be of the same width and as you go along to tuck make sure there is no gap between the pleats. Continue pleating till you reach the other end of the waist on the left and tuck the last pleat there.
- Now continue tucking in the saree neatly as you approach the back and cross the already tucked in the first layer and cover that and continue moving on to the right side of the back waist.
- Take the rest of the fabric and make pleats and allow it to drop. You may take one corner and tuck it at the waist on the left side.
- Remember to pin up the pleats in a few places to make them more secure and also at the pallu and at the shoulder. It is also imperative that you remember to wear some kind of cummerbund or jewellery that could be at the waist thereby beautifying the look of the lehenga. Remember to also ensure that all pleats are equidistant and of the same width and at the same level above the floor.
Brahmin Style Saree Draping
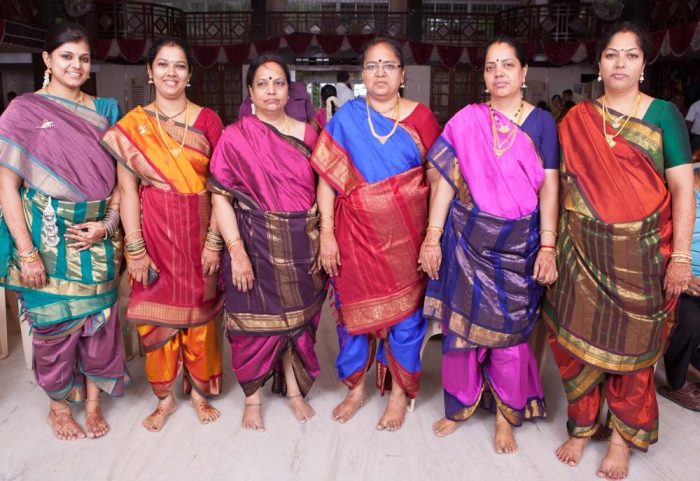
Steps to follow:
- To drap a Brahmin style, we will make pleats on pallu and pin them from 1.2 metres to a 1 metre length.
- Take the inner section of the saree, wrap it around your waist at the back and bring the end from front to the right side and tie a firm knot of the saree here. Take the Pallu pleats and drape it from left to back and again to the front side. Place it at the left shoulder and pin it at the blouse roughly.
- Adjust the front drape border here and then make a wrap-around and tuck it roughly on the left side. You will have a front loop for skirt pleats.
- Take the saree’s lower edge of the middle section and pull to front, this will make a dhoti or wrap effect on both legs from behind. Now tuck this from the bottom of the knotted fabric roughly, we will need this for the kela (a word used for the covering of pleats at the waist). Make lower skirt pleats that open on the right side instead of the left side. Leave the first two top pleats on the left side.
- Align all pleats together and then wrap them from the big pleat fabric on left, cover all pleats till knee-length neatly. Now hold pleats at the top edge and fold them once in a bundle, use the waist border to cover it so it stays in a bundle which is your kela. Again take the fabric which was pulled from the back to front and cover the kela again and tuck the rest in the waistline.
- Now split the lower pleats to two sides. Hold the lower edge from this section and pull it back between your legs for the Kashta. Pull it tight enough so you have at least half meter fabric at the lower back knee level.
- Fold the border part so it turns up on the right side, and make pleats on the folded part. The border will face the left side, use pins to secure, and tuck it in the back waistline.
- Now adjust the front drape pleats where your outer border will be in cowl covering the front mid-waist section. The pallu will not be aligned at the width section.
Kerala Style Saree Draping
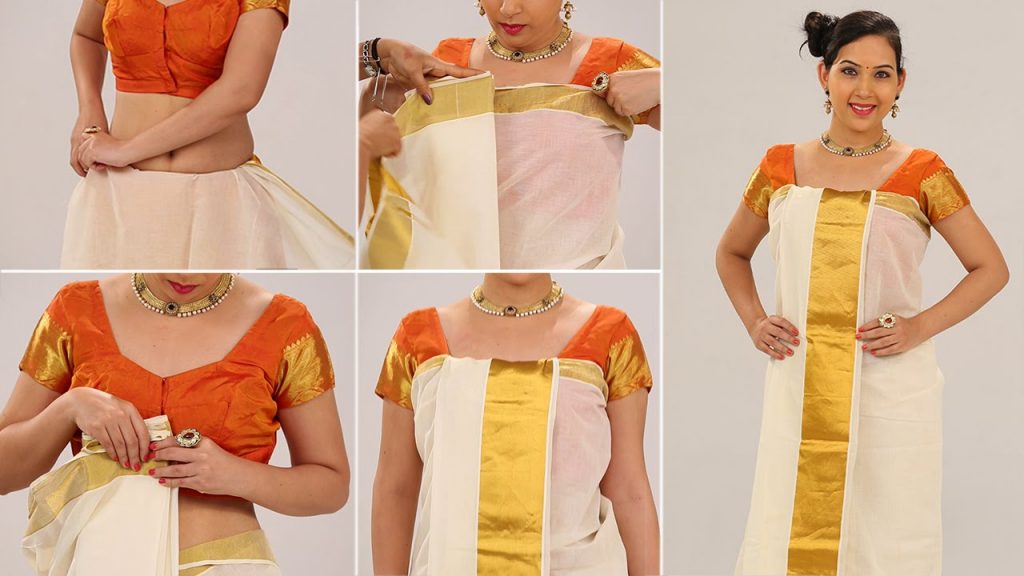
Steps to follow:
- Use the traditional Kerala saree for this. Tuck the end of the saree (non- pallu end) on the right side and bring it around the waist to the backside, tuck it in fully while doing the same.
- Bring it towards the front again and tuck it on the sides twice, leaving some length of fabric in between. Now make pleats in the front and tuck it in the centre.
- Now take the pallu and drape it around the person over the chest and back once fully keeping the hands outside.
- Now with the remaining shorter pallu fabric, make 3-4 pleats and tuck it in the chest area. This is the famous Kerala style saree draping.
Retro Style Saree Draping
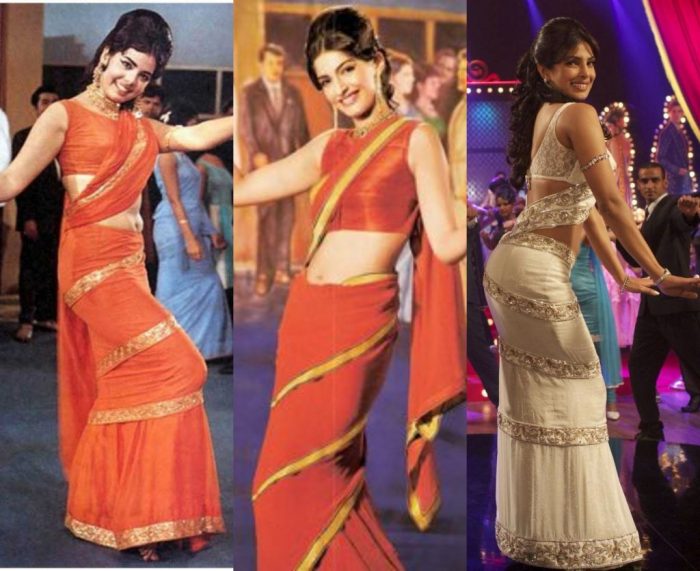
Steps to follow:
- Use a chiffon or georgette saree with borders, for this method. Tuck the end of the saree (non- pallu end) on the right side and bring it around the waist to the backside, tuck it in fully while doing the same.
- Bring it towards the front again and hold the pallu towards the left and with the fabric in the middle, make pleats in the front and tuck it a little towards the right side, adjusting the pleats in the centre.
- Drape the saree around the person along the waist and tuck the fabric neatly all through. While on the front side, bring the saree a little high such that it drapes one layer above the lower layer showing 2 rows of borders, bring the saree around the person again tucking the fabric in the same length.
- Now in the front make smaller pleats and keep the length shorter for the pallu and pin it over the left shoulder.
Maharastrian Style Saree Draping
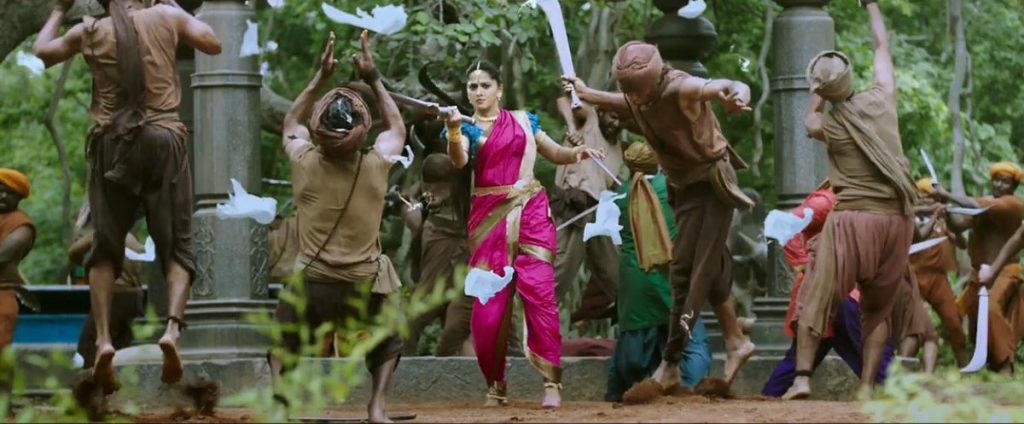
Steps to follow:
- Start by draping the saree around the waist where most of the fabric comes on the right side and the corner of the left is tied with the saree on the right side. Make two double knots.
- Pick the lower corner of the left side wrap and roughly tuck in at the knot so this end doesn’t peep out after the saree is worn.
- Take the width section of the pallu and make pallu pleats. Drape them around from right to left and back to front. Drape them over the left shoulder now.
- Take the inner border and drape tightly around the bustline, take it around the back and tighten the edge of the saree by tucking it roughly on the left waist.
- Take the loop of the saree in front of you, and make pleats from the right side. Complete this and leave one pleat fabric on left. Turn the pleats to the right, so they open on this side. Wrap the pleats with the saree edge from the left that we left. And fold everything at the centre waist by using the inner saree wrap border, and twist it around to hold pleats.
- Part the lower pleats in half and pull the middle edge to the back between two legs. Neatly tighten it to drape well and make small pleats on the fold to drape pleats in the back mid-waist.
- Then, adjust the front shoulder pleats neatly and pin the pleats at the left shoulder. This completes the look.
Happy trying ladies!
Follow us on Instagram, Facebook or Telegram for more updates and breaking news.


